Public Art
Penn Manor High School – Starry Night Glass Mosaic, 2012
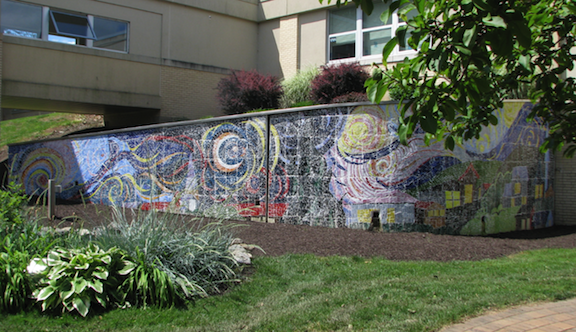
Returning from sabbatical in the fall of 2008, I decided to tackle the ugly courtyard wall and lead students through the process from design, to installation of a glass mosaic of a student-team interpretation of Starry Night in glass mosaic; 2008-2012. Penn Manor Education Foundation funded this 4-year project, in which over 500 students participated to make it happen. It is a back drop to the Mr. Jeff Churchill memorial Pond in the Penn Manor High School theater courtyard.
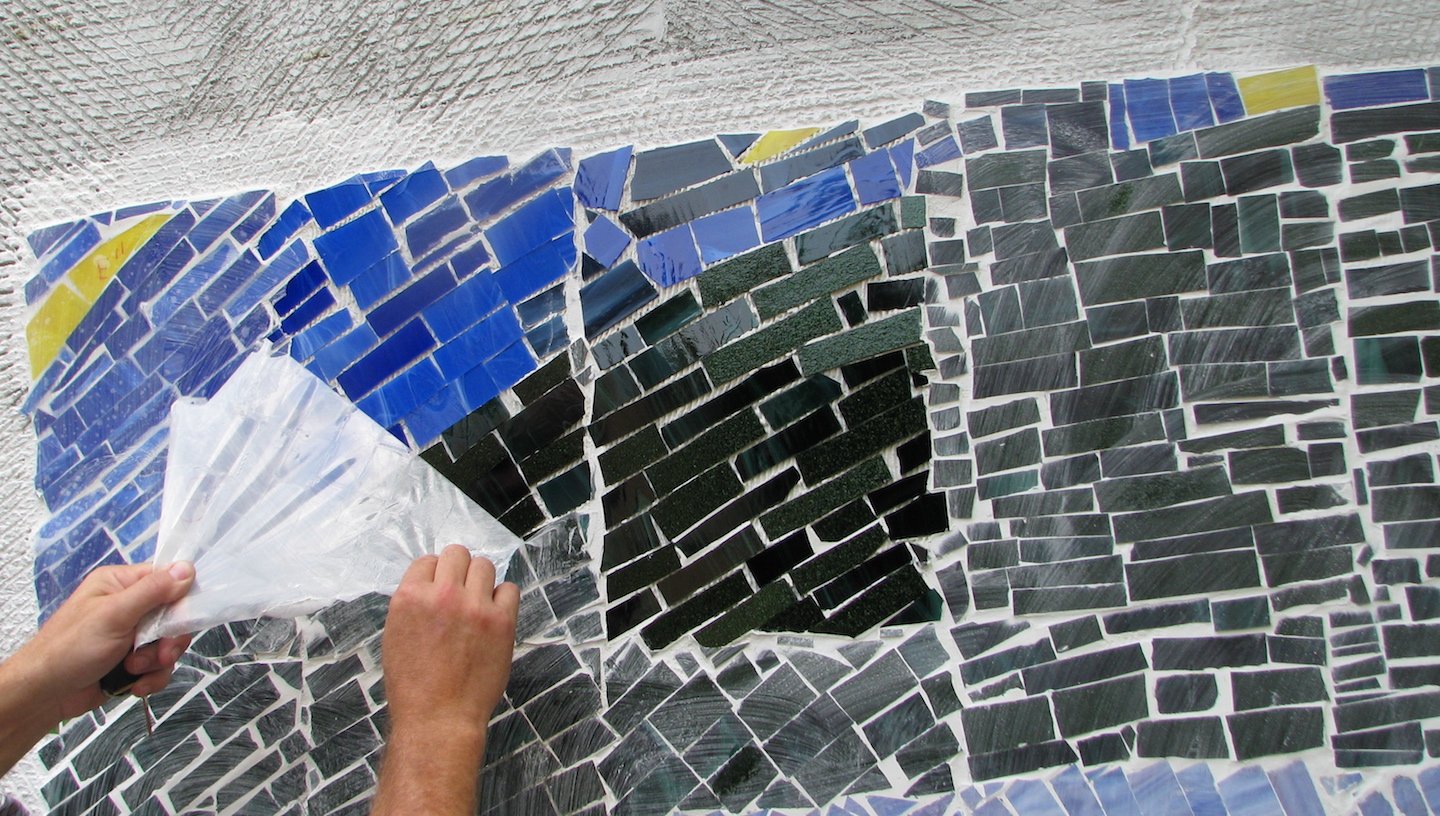
Removing the mosaic mask 24 hours glass was applied to the prepared section of wall. This was always exciting to remove and reveal the sparkling glass glimmer in the sun. That was a reward students looked forward to participating in, the masked glass sparkling in the sun.
Process

The beautiful finished wall. Photo taken on June 6, 2012, my last day of teaching here. All of my classes had a hand in the process, from 2008 to 2012. Over 500 students grades 9-12.

Class teams in the Commercial Art class designed concept drawings to best illustrate the painting Starry Night. Class critiques narrowed five presentations to this selected version.

Color codes recorded the contour b/w mapping of the design grids. All work was planned as the project evolved, a few steps ahead of the assignment the students needed daily..

¼ scale paper model takes shape as each vertical rectangular grid was assigned an alpha/numeric row and column designation. Full scale color cartoons for glass work were made from this model.

The ¼ paper model color-collage work is cut apart and enlarged the full scale color cartoons to become the guide for glass-work. These were enlarged color copies, and the ¼ model was reassembled for reference.

Color paper scale maquette (model) and the real size patterns, called cartoons. With the paper maquettes completed, the enlarged color cartoons were created at the Millersville University Copy Shop.

This scale model was divided into vertical rectangular grids to hold color paper copies of the actual glass colors. Mosaic application of the paper simulated the glass counterpart. Each student was assigned a color cartoon and with corresponding color code guide to place glass pieces, cutting and fitting them into place over the matching paper shapes.

Cartoon D12; row D, column 12. A color code guide to glass bins: G2, green 2 for the bottom; G5, green 5; G1 + G4 mid section; G3, green 3 top section. Eye protection, glass cutters and nippers start the process from paper pattern to glass. Mosaic mask, a specialty tape made for glass and ceramic mosaics secures glass for storage and application.

Glass panels are organized and stored for grid design corrections. Students had trays on which a color cartoon was placed and glass laid carefully on top. These were stored in commercial rolling baking carts, as were the numerous bins of stained glass colors. Organization of every step was needed to keep the process on schedule and students working.

A student works on glass corrections. To reduce the grid pattern in the final placement of the glass, students work to make sure panels fit side to side in rows, as well as the top and bottom in columns. Often glass is replaced to insure a good puzzle fit, to make the design application seamless.

Prepared concrete wall with metal lath and concrete skim coat. The metal lath and concrete skim coat is standard for mosaics on masonry surfaces. It allows for expansion and contraction with temperature differences on outside installations. Civil engineering with art installations.

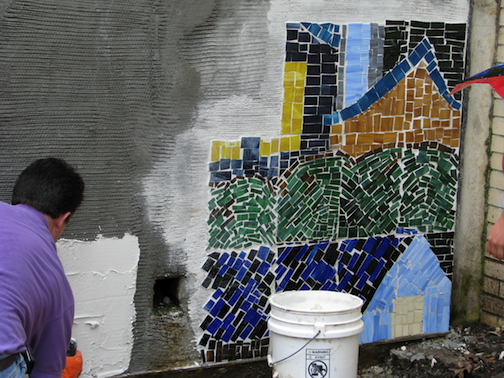
Glass application one panel at a time. The tinted white Thinset is applied to the metal lath and each panel is applied and pressed into the thinset to encase each piece of glass. 24 hours later, this is set and safe to peal away the tape mosaic mask. Drainage seep holes to deal with..

Work progresses and a major part of learning how to apply and slowly learn how to make the grid less noticeable. At this point in the process, some students are eager to work on this after school and over summer vacation.

Removing the mosaic mask 24 hours glass was applied to the prepared section of wall. This was always exciting to remove and reveal the sparkling glass glimmer in the sun. That was a reward students looked forward to participating in.

Tape notes on application needs are common in some areas. The process moved from bottom to top, right to left over two years. We made personal challenges to see that the grid rectangles would become less noticeable.

June 2011. The mosaic is about half completed. Summer work sessions beckon students back to this project. A last grant was secured to work with a metal fabricator for a stainless steel cap to protect the mosaic. One more year.

View from 1998 era hall bridge to west wing; English, art, ag, business, history, phys-ed, tech. The mosaic and courtyard needed to be razed for the construction of a much-needed new HS building; near completion as of this posting, 2022.

Making way for a new high school building. This is the southwest-most corner, room 345, where the mosaic designs for the wall started. My students in Commercial Art, Art I, Fine Art, as well as Ceramics in 336 helped.
Daniel’s Den Playground at Manor Church
Daniel’s Den was created to be a fully assessable playground so all children who visit it can enjoy access despite physical challenges. Manor Church in Lancaster County, PA has an active disabilities ministry and provided land for this park. I contributed by making yet another iteration of my 1998 and 2008 series of art work with a focus on faces in bronze, clay, and felt. Two each of these flat 1” thick outdoor masonite versions were made, 3’ high for this entry into the playground.
The right wall to the entry area of the playground. This wall has a companion wall forming a secure entryway into the children’s playground. That wall displays the same faces to be viewed from the opposite side of the park. Scale contour drawings of the figures, Eric and Self of Sorts, in the 3’ two-dimensional paper to transfer to outdoor masonite, primed, painted in acrylic, with polyethylene layer.
Figures in 3’ two-dimensional versions were faces were inspired by public elementary school students. I enjoyed six years of teaching art to K-6 elementary students, mainly at Pequea Elementary. An itinerant art teacher, while teaching at Pequea, I also taught at Letort and Conestoga Elementary schools at different times during those years in the 1990’s. This park was created in 2012.
Above: I spent the summer of 2010 creating the drawings in preparation for these painted versions. They are in front of my garage awaiting installation.
Left: Bodies of work from series in 1998 and 2008 inspired me to try yet another iteration of the same faces. All of the faces in this work are seen in may versions on this website. I never tire of them and have recycled them to explore a new way. Moving to other work, faces will continue to influence and speak to me.


